Showing posts with label kitchen. Show all posts

The apple butter time of the year! Last week we canned 19 pints of apple butter.

Here it is cooking down....


...and after we added the spices...


Doesn't it look delicious?

Tardy Turkey Day Greetings

Despite my tardiness in posting, we had a nice thanksgiving. Our main course was gumbo & french bread (here's the gumbo cooking)


I made delicious bean dip from Foodie Farm Girl's recipe. (It's not terribly photogenic in this picture, but we ate it before I remembered to get a better picture!


We also had pecan pie, squash pie, and soybean pie (yum).


(I ate squash and soybean for breakfast and lunch for days afterwards....)

Mozzarella


There are quite a few recipes out there for making your own mozzarella. I don't remember which one we used, but I don't think it's terribly critical, since it was wrong. :-)

Basically we added some rennet, (found at grocery store), citric acid (found at health food store), and milk together in a pot, and heated it up. The instructions that I found bookmarked on my phone (best guess as any, but I think we ended up combining several recipes) say to combine 1 gallon milk and 2 tsp citric acid and heat to 88 degrees F. Then, add 1/2 tablet of rennet (dissolved in 1/4 cup chlorine-free water), and heat it up to 105 degrees F. The directions then said to turn off the heat and large curds would appear in a sea of clear-greenish whey. This did happen for us, but we had to wait several hours before the curd was firm (slice-able), and the whey was clearish.


Now the fun begins! We drained the whey off, and pressed the curd to get as much whey out as possible. (it was hot!)


(I saw a recipe on the insert that came with the rennet that said you can make a different type of cheese out of just whey...so you can always save it! My thought was you could maybe sub for liquid in bread... could be sourdough-y?) At this point, we followed the recipe to microwave for 30-second or so increments, pressing and draining the whey out in between.


After about 3 of these, we could start kneading the curds. It was tough going at first with the kneading, as the curds really didn't want to stick together, but we kept at it.


The curds actually got rather bouncy, like pizza dough. (we had to reheat the whole mess several times to keep kneading--otherwise the curds stopped sticking to each other).


When it felt and looked like a ball of mozzarella, we figured we were done.


We formed the ball of curd (now cheese) into two balls, put them in a container of salt water (later we learned that a little goes a long way and mozzarella soaks up whatever you keep it in--note if you go too far with the salt just soak it in plain water for a while) and stored them in the refrigerator. According to what I read, the fresh cheese will only keep about a week.


I promise I'll take more reliable notes next time! (cheese-making is messy)
So a few weeks ago, we made our characteristic pizzas (this time one on sunday and one on friday)...but there was something different....


Are those slices of fresh mozzarella? They are. (but that's not the best part...)


You want to know the REALLY special part? (I feel like I have to leak it, since I haven't gotten that post written yet........) We made it. :-) Yummy. Home-made. Mozzarella. (Post to come...I promise)

Comfort Foods

The leaves are starting to change color (partially from cold, partially from drought...), and there's a chill in the air. This can mean only one thing:  it's time to haul out the comfort foods.


Venison Chili
(inspired by two recipes from a game cookbook that was a gift from my parents)

Yeast-free Pizza

Several weeks ago, S. and I had a craving for homemade pizza. We had everything we needed: tomato sauce, toppings, and mozzarella (this is usually the ingredient we forget about...) The only thing we neglected to check....was yeast.

So, what about a flatbread pizza? It's flat. It doesn't use yeast, does it?? Um, yeah. Turns out it does. Leafing through a cookbook, it turns out most "flat" breads do, in fact. Ok...... how about google? Success!

After reading several recipes, and several more recipe reviews, this is the one we settled on. The dough was definitely different to work with, but not too weird. (We had nightmares of pizza on crackers at this point). And it baked up pretty stinkin' well.


This wouldn't be my pizza dough of choice, but I think we'd definitely give it another go if we were out of yeast. It was a little crisper, and a little drier than I prefer, but it was pretty good.

Egg Muffin Breakfasts

A few weeks ago, we decided to stray from our regular breakfast options (crumpets, bagels, etc.) Instead, we decided to give the many (many) eggs in our refrigerator a try....egg sandwich style.

First we toasted some english muffins, and put a pat of butter on each. Then, we put a fried egg in the middle.


See that cool ring the egg is in? S. unbent a cookie cutter to make that. Brilliant! (and it works perfectly).


Then we put some bacon on top, and some muenster cheese......and into the freezer they went.


5 minutes in the microwave, and these things make a delicious breakfast on-the-go.
Our pet birds love their mixed veggies, so we decided as part of our frugality efforts to make our own. So we have frozen corn left from last year, and frozen green beans. Peas, we decided, are too expensive if we have to buy them to freeze them, so next on the list was carrots. Despite our successes this year, there's no way there were enough from our garden to freeze....so we hiked off to the store and bought a 5 pound bag on sale.

On to chopping....


(Thank you S. you make a lovely hand model... :-) 


Here they are, all chopped. (yes, this is how we should have tried to chop the cucumbers for dill relish...)


Chopping the carrots was, by far, the most time-consuming part of the process
(but we wanted our cute little dices)

(Is "dices" a word?)

Next, we blanched the carrots for 3-5 min


Note the crazy scary orange foaming water....

We froze them flat on a cookie sheet, as we did the green beans. That works really well for not ending up with one block of iced veggies. Isn't that color crazy?


...and here it is all bagged up (it barely fit...I probably should have used two bags....)

Challah

Several weeks ago, found us with pullets up to almost full-size laying, and waaay too many eggs in the fridge. I decided to try my hand at an egg-heavy baking venture. After looking at a few different recipes (and deciding that we probably would never eat that much pound cake if I froze a bunch...) I settled on Challah bread. It's yummy, and uses quite a few eggs....unfortunately, it also looks a bit...ahem..intensive...and no, I have no family recipe to go on. Instead, I borrowed someone else's. An expert, Smitten Kitchen. :-)

Her recipe pretty much says it all, and really did make for a pretty easy experience.  I don't have any pics of the dough, but S. was kind enough to get my attempts at following Smitten Kitchen's braiding directions burned into monitors everywhere. :-) I gave up on the directions (sorry!) and just stuck to what I know, which is a fairly straightforward multi-strand braid....take the right-most and alternate over-under-over, then take the new right-most and repeat. Not authentic, I'm sure....but it looks much more presentable than my earlier attempts.


After braiding, I brushed both loaves with lots and lots of egg yolk....


Then into the oven. The loaves did take a bit longer to bake then the instructions said...but I used the internal temperature guidelines...and that worked out great! We ate one loaf right away, and froze the other one for later. This was very yummy---it took a while, with all the risings, but I'll definitely make it again...

Dill Relish

A couple of weeks ago, we finally (I think) pulled in the last of our cucumbers...there weren't quite enough for pickles again....(phew). We decided instead to try a half-batch of relish. Why? 'Cause I thought it would be neat---we'd never made relish before. The pickles were on the old and large side too, so we were a bit concerned about pickle texture....Relish seemed perfect!


We actually only had about 4 pounds of pickles this time...so a half-batch worked out for us. We didn't dice the pickles by hand (instead preferring to be clever and automated, we used the food processor). The food processor yielded a bit more...um...shredded? Grated? A result then we would have gotten if we'd diced by hand (or tried the mandoline....ahem...yeah, forgot about that).  Ah well, learning experience, right?

So, following the directions, you had to soak and brine (with turmeric) for a bit, and then bring the whole mess to a boil...

It was a little bit difficult to keep our shredded cucumber under the brine during this step...

...and here we're boiling it...
We used jelly jars for ours, rather than pints. It was really a pretty easy process, and if it turns out tasty, I think I'd do it again. (With perhaps more of a dice...)  :-)


Grilled Squash


So I know you know that we've been doing nothing but harvesting cucumbers and summer squash for the past few months... And I shared that we made some delicious stuffed squash, and TONS of sauteed squash....but did I mention grilled squash? It's super-easy. Just marinate slices of summer squash in some olive oil and light seasoning, grill until tender, then store them in the refrigerator for dinner later in the week. :-)

Green Bean Time

Once again, this year, our green beans did not do well (and our soybeans are gangbusters, but the beans aren't developing within the pods :-( which is another story, I suppose). So, we hiked off to our grocery store and bought a bunch in bulk to freeze for the winter, since it worked so well last time!

First we washed and snapped 'em.

These are the snapped off ends, which we gave to the chickens and ducks...

Then, we blanched them and froze them.


Easy! And we have two stuffed-to-brimful freezer bags of green beans. (This time we froze them on a cookie sheet before transferring them to the bags...each bean stayed separate...not in a block of ice, like last time.)

Lazy August

So, despite my lack of posts in August, we actually were pretty busy. We froze some green beans, made relish, baked Challah bread to use up some eggs,grilled tons more of those scalloped summer squash, and brought in our biggest crop of carrots yet (we've never really been great at growing carrots). So why no word of these things? Ummmm...they're coming. I promise!

In the meantime, how about some more pictures of our lovely laying hens dust bathing? :-)
....and of course, Roscoe the rooster.

Stuffed scalloped squash

Just in case you're wondering what we're doing with our multitudes of scalloped sunburst squash....

Grapefruit (marmalade)

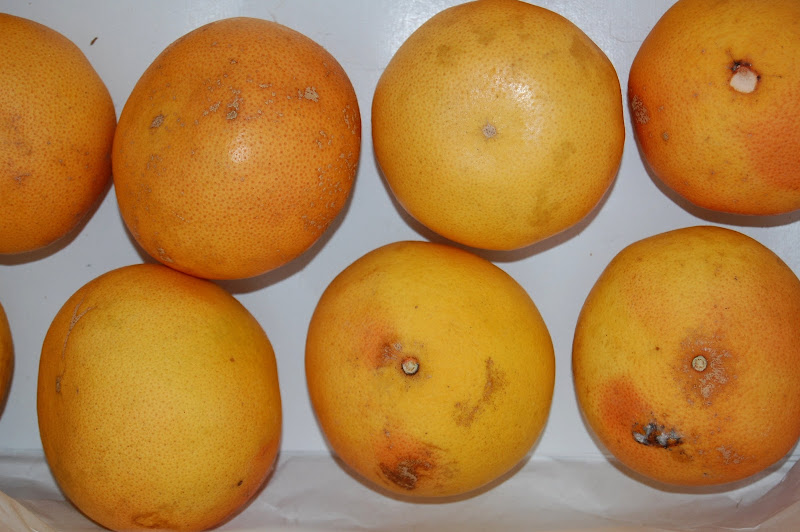
So while I was meeting some new friends, I also met my first citrus tree. It was a grapefruit tree.


So...naturally we picked some grapefruit ('tis the season for grapefruit, apparently).


Now this all happened the week of Christmas...quite some time ago...what to do with with all of this rapidly-becoming-overripe grapefruit? Can it, of course...

We made grapefruit marmalade (I haven't opened it yet, but I tasted it before canning and it was quite tart...something that I would like on an english muffin, but not to everyone's taste.)

So, without further ado...here's what we did (amounts from the recipe are approx, as we doubled-ish):

Grapefruit Marmalade (adapted from the Ball recipe)
Yield: about 3 half-pints (We canned 8 jelly jars after doubling the recipe)

- 2/3 cup thinly sliced grapefruit peel
(the recipe claims that this is about one medium grapefruit..we didn't find any of the equivalencies to hold true for our grapefruit..it was more like 2 of ours)
- 1 and 1/3 cups chopped grapefruit pulp
(I poured the majority of the juice out and put it in the fridge)
- 1 quart water
- sugar


Here's our peel...ready to go


...and this is our pulp.
I tried to actually remove the membranes as well as I could...messy, juicy work!


Cover grapefruit peel with water; boil 10 minutes; drain. Add chopped (ha! chopped? Have you ever tried to chop the inside of a grapefruit?!) pulp and 1 quart water to drained peel; boil 10 minutes. Cover and let stand for 12 - 18 hours in a cool place. (Ours actually ended up 'sitting' for more like 20-24 hours....) Then cook rapidly until peel is tender (only took us another 5-10 min).

Here's the mixture...tenderizing the peel

Measure fruit and liquid -- add 1 cup sugar for each cup fruit mixture (we doubled the recipe, and I recall had about 6 and a half cups of mixture), stirring until sugar dissolves. Bring to a boil over high heat, stirring constantly to prevent sticking (ours really didn't have a sticking problem--unlike most canned jams/jellies/butters we've made). Cook rapidly until almost to gelling point (I believe gelling point is 120 Fahrenheit--use a candy thermometer)


Skim foam if necessary (it wasn't...). Ladle hot marmalade into hot, sanitized, jars, leaving 1/4 inch headspace. Adjust two-piece caps and process for 10 minutes in a boiling water bath canner.


**I included more information in an earlier canning post about the process. These are by no means exhaustive or even all-inclusive instructions. If you're not familiar with canning, consult an expert or your local cooperative extension office for safety information.

If you're not comfortable with canning, you can always make a small batch and keep it in the fridge for a week or less (if it even lasts that long--yum).
Related Posts with Thumbnails