The
apple butter time of the year! Last week we canned 19 pints of apple butter.
Here it is cooking down....
...and after we added the spices...
Doesn't it look delicious?
Posted in:
apple butter,
canning,
food,
homestead,
kitchen
|
|
|
I haven't been posting too much over the past few weeks. Why? I've been busy.
This is Shaylee (she doesn't like cameras much). She's the newest member of the family.
Posted in:
busy,
dog,
homestead,
random,
shaylee
|
|
|
There are quite a few recipes out there for making your own mozzarella. I don't remember which one we used, but I don't think it's terribly critical, since it was wrong. :-)
Basically we added some rennet, (found at grocery store), citric acid (found at health food store), and milk together in a pot, and heated it up. The instructions that I found bookmarked on my phone (best guess as any, but I think we ended up combining several recipes) say to combine 1 gallon milk and 2 tsp citric acid and heat to 88 degrees F. Then, add 1/2 tablet of rennet (dissolved in 1/4 cup chlorine-free water), and heat it up to 105 degrees F. The directions then said to turn off the heat and large curds would appear in a sea of clear-greenish whey. This did happen for us, but we had to wait several hours before the curd was firm (slice-able), and the whey was clearish.
Now the fun begins! We drained the whey off, and pressed the curd to get as much whey out as possible. (it was hot!)
(I saw a recipe on the insert that came with the rennet that said you can make a different type of cheese out of just whey...so you can always save it! My thought was you could maybe sub for liquid in bread... could be sourdough-y?) At this point, we followed the recipe to microwave for 30-second or so increments, pressing and draining the whey out in between.
After about 3 of these, we could start kneading the curds. It was tough going at first with the kneading, as the curds really didn't want to stick together, but we kept at it.
The curds actually got rather bouncy, like pizza dough. (we had to reheat the whole mess several times to keep kneading--otherwise the curds stopped sticking to each other).
When it felt and looked like a ball of mozzarella, we figured we were done.
We formed the ball of curd (now cheese) into two balls, put them in a container of salt water (later we learned that a little goes a long way and mozzarella soaks up whatever you keep it in--note if you go too far with the salt just soak it in plain water for a while) and stored them in the refrigerator. According to what I read, the fresh cheese will only keep about a week.
I promise I'll take more reliable notes next time! (cheese-making is messy)
Posted in:
cheese-making,
cooking,
homestead,
kitchen,
mozzarella,
rennet
|
|
|
So a few weeks ago, we made our characteristic pizzas (this time one on sunday and one on friday)...but there was something different....
Are those slices of fresh mozzarella? They are. (but that's not the best part...)
You want to know the REALLY special part? (I feel like I have to leak it, since I haven't gotten that post written yet........) We made it. :-) Yummy. Home-made. Mozzarella. (Post to come...I promise)
Posted in:
cheese-making,
cooking,
homestead,
kitchen,
mozzarella,
pizza,
pizza friday
|
|
|
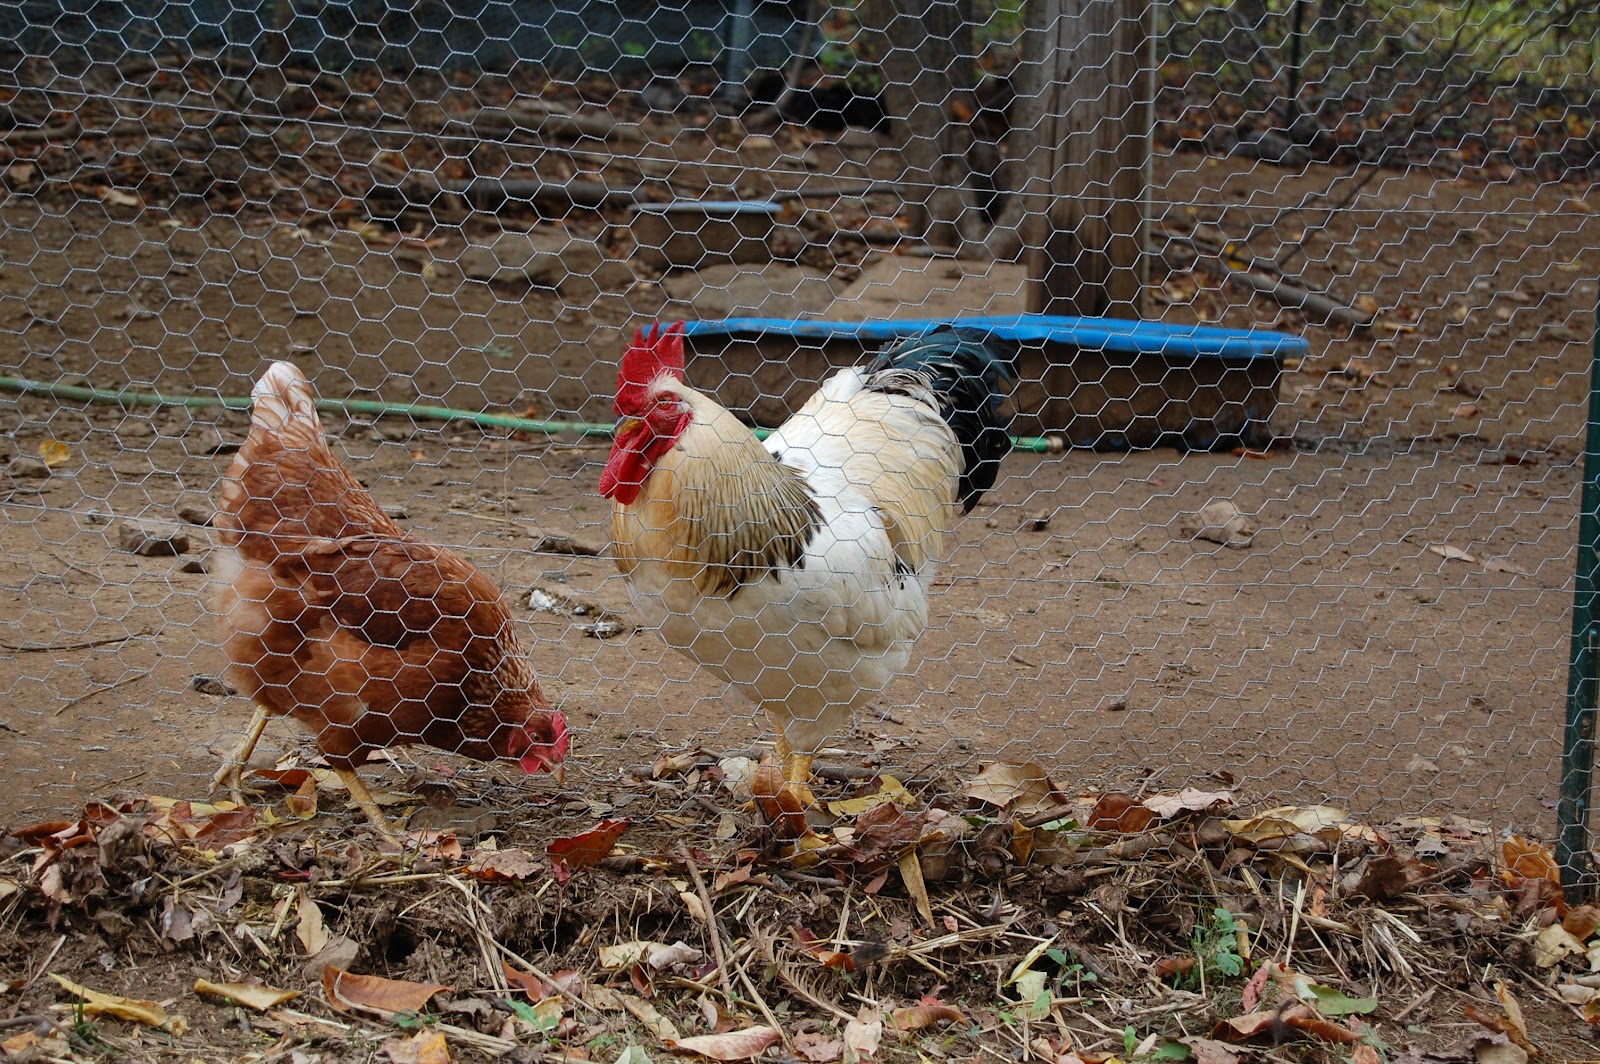
Are you looking at me??
Oh. That's ok then. I AM rather proud of my looks..... :-)
Posted in:
chicken,
homestead,
photos,
rooster,
roscoe
|
|
|
It might be time to get the leaf blower out...
Posted in:
autumn,
fall,
homestead,
leaves,
photos
|
|
|
S. has been busy chopping wood for the past month or so (this is only about a third or less of it...the rest is under a tarp). Doesn't it look warm? :-)
Posted in:
autumn,
firewood,
homestead,
photos
|
|
|
So, apparently when they're about 18 months old, laying hens have their first molt. According to what I've read, they basically stop laying during the molt, to put energy into feathers, and then ramp back up the spring after their molt. (As counter-intuitive as it seems, most molts apparently take place in fall...you know, when it's starting to get colder...?)
Either way, they look awfully pathetic... We only have one molting, which seems odd to me, since we have 4 of that age. I guess we'll just have to see if the rest follow suit.
Posted in:
chicken,
homestead,
molting
|
|
|
A couple of weeks ago, we finally (I think) pulled in the last of our cucumbers...there weren't quite enough for pickles again....(phew). We decided instead to try a half-batch of relish. Why? 'Cause I thought it would be neat---we'd never made relish before. The pickles were on the old and large side too, so we were a bit concerned about pickle texture....Relish seemed perfect!
We actually only had about 4 pounds of pickles this time...so a half-batch worked out for us. We didn't dice the pickles by hand (instead preferring to be clever and automated, we used the food processor). The food processor yielded a bit more...um...shredded? Grated? A result then we would have gotten if we'd diced by hand (or tried the mandoline....ahem...yeah, forgot about that). Ah well, learning experience, right?
So, following the directions, you had to soak and brine (with turmeric) for a bit, and then bring the whole mess to a boil...
It was a little bit difficult to keep our shredded cucumber under the brine during this step...
...and here we're boiling it...
We used jelly jars for ours, rather than pints. It was really a pretty easy process, and if it turns out tasty, I think I'd do it again. (With perhaps more of a dice...) :-)
Posted in:
canning,
cucumbers,
dill relish,
food,
garden,
homestead,
kitchen,
pickles
|
|
|
Once again, this year, our green beans did not do well (and our soybeans are gangbusters, but the beans aren't developing within the pods :-( which is another story, I suppose). So, we hiked off to our grocery store and bought a bunch in bulk to freeze for the winter,
since it worked so well last time!
First we washed and snapped 'em.
These are the snapped off ends, which we gave to the chickens and ducks...
Then, we blanched them and froze them.
Easy! And we have two stuffed-to-brimful freezer bags of green beans. (This time we froze them on a cookie sheet before transferring them to the bags...each bean stayed separate...not in a block of ice, like last time.)
Posted in:
food,
freezing,
frugal,
green beans,
homestead,
kitchen
|
|
|
Today I found a surprise when I went out to get the chicken eggs. I took a quick peek in the duck house to make sure that nobody laid in it...and....
This is a Cayuga egg (they range from grey to light grey blue, according to our catalog --- the Runner duck eggs will be white when they start laying). We weren't expecting any of the ducks to start laying until spring so this is quite a surprise! It was fairly small, smaller than the chicken eggs, so probably was the first. (I'm sure they'll get larger with time).
Posted in:
duck eggs,
ducks,
homestead
|
|
|
So, despite my lack of posts in August, we actually were pretty busy. We froze some green beans, made relish, baked Challah bread to use up some eggs,grilled tons more of those scalloped summer squash, and brought in our biggest crop of carrots yet (we've never really been great at growing carrots). So why no word of these things? Ummmm...they're coming. I promise!
In the meantime, how about some more pictures of our lovely laying hens dust bathing? :-)
....and of course, Roscoe the rooster.
Posted in:
august,
baking,
chickens,
food,
garden,
homestead,
kitchen,
lazy
|
|
|
And here they are again (more in focus). I think that's Daria in front. It could be Darcy (hard to tell the difference.....at least with the Runners, Daisy has more freckle-spots and pinker feet than Delilah; With the Cayugas, Daria is a teensy little bit bigger then Darcy...or at least was 2 months ago). Either way, there's one of Cayuga who always looks darned intelligent when I bring out the camera...or even do anything really. That's this one. :-)
Posted in:
ducks,
homestead
|
|
|
...and here are the ducklings, all grown up. (I know, I've been reeeeally behind on updated pictures of the new flock, so I'm trying to redeem myself with some cute duck pictures.)
The grey one is one of our Blue Indian Runner ducks (either Daisy or Delilah), and the black one is one of our Cayuga ducks (either Daria or Darcy).
Posted in:
ducks,
homestead
|
|
|
Remember how we wanted a rooster? Yeah, I know I've been lax with updated chicken and duck pix...which brings me to my question....Have you met our new rooster, Roscoe? Our white straight run chick with the black wing patches sure enough turned out to be a one of these. :-)
Posted in:
chicken,
homestead,
rooster,
roscoe
|
|
|
Two weekends ago we finally bit the bullet and built a chicken run (hens roaming two houses down--and they're not close-together-houses, mind you---was a bit much. The neighbors thought it was funny...but...y'know. "Good fences make good neighbors" and all....)
It's pretty roomy, though...we haven't heard too many complaints.
The gate is quite temporary, and still needs some work. We have a better one in the works and it's in the process of being painted :-)
Posted in:
chicken,
chicken coop,
chicken run,
ducks,
homestead,
run
|
|
|
After our several-weeks-long ordeal of icicle pickles, we decided to try something easier. We'd only ever really made sweet pickles before, and our recipe collection had a nice bread and butter pickle recipe that called for a weight of pickles divisible by our actual weight of pickles (we had another 8 lbs) so we thought we would give it a try. (Note: Turmeric stains a lot and is fact commonly used as a dye. Yeah. Forgot that and our counter has some interesting yellow-hued patches now...) :-) Ah the marks of a canning kitchen.
First we mixed up the pickle juice with turmeric, onions, etc. (cool color, huh?)
Then we put the cucumber slices in the mixture and brought it back up to a boil.
After that, it was all downhill....we only had to pack the jars. :-) Much easier.

I can't wait to try these...I've never had Bread and Butter pickles and they really smelled amazing!
Posted in:
bread and butter pickles,
canning,
cucumbers,
garden,
homestead,
pickles
|
|
|
What's that teeny tiny little egg? It's our first pullet egg of the year.
Posted in:
chicken,
egg,
homestead,
pullet egg,
pullets
|
|
|
Two weeks ago (wow, the days fly by) we embarked on an icicle pickle adventure. I say adventure because S. and I had never made a pickle recipe that required multiple draining and bringing, etc periods. We used the recipe for Sweet Icicle Pickles in the ball blue book. So, basically we had to find containers to house 8 pounds of sliced cucumbers (and associated liquid) over a week-long period)... We used some gallon jars...

First you brine them (water and salt) and let them sit for a week. Then, we rinsed 'em and covered them with boiling water and let them stand overnight again. Next, it was time for the pickling spices...so we boiled those, vinegar, and sugar, then let the whole mess sit for another 24 hours. Now's the fun part...Every day, for the next week we drained off the liquid, re-boiled it, and put it back over the cucumbers.... (ag). So finally, we were ready to can them! One more boil and then into the jars (we actually came up a tiny bit short on brine and had to whip up some sugar-vinegar-pickling spices at the last minute....). And voila.... here's hopin' they taste good! (and yes, they're slices...not typical "icicle" style..but some of our cukes--ok most--were waay too big for spears.)
Posted in:
canning,
cucumbers,
garden,
homestead,
icicle pickles,
pickles
|
|
|




 Posts
Posts


