Showing posts with label chicken coop. Show all posts

Chicken Run

Two weekends ago we finally bit the bullet and built a chicken run (hens roaming two houses down--and they're not close-together-houses, mind you---was a bit much. The neighbors thought it was funny...but...y'know. "Good fences make good neighbors" and all....)


It's pretty roomy, though...we haven't heard too many complaints.


The gate is quite temporary, and still needs some work. We have a better one in the works and it's in the process of being painted :-)

Cleaning Out the Coop

On Saturday, we cleaned out the chicken coop.

Essential equipment:


We filled up 4 cart loads, and afterwards the coop was nice and clean:


Then we took them down to the veggie garden....


Where S. tilled them in. On monday, we planted our beans, peas, and broccoli (more details on what and where later). Yay--we have veggies in the ground :-)

Chicken Coop renovations


Today we finally put a litter board on the chicken door. That'll keep the litter in the coop from coming out of the door when it's open (all day long), so we don't have to push it back in every night when we close the door. Yay. :-)

Just another Saturday


Over the week, S. put a door on the duck house (thanks, S!) so we cut some vent holes in the sides and tonight will be the ducks' first night out there.


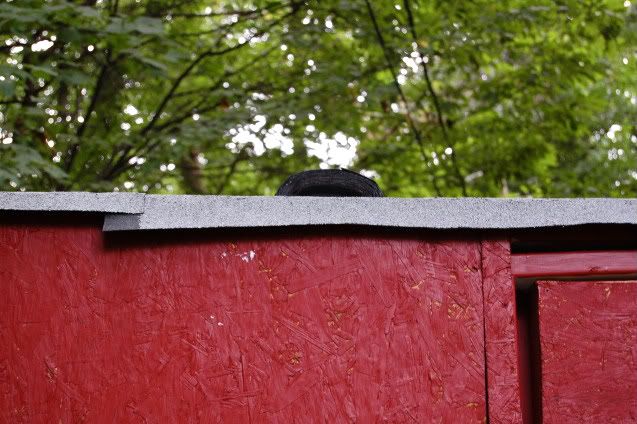
We also (ok, mostly S. again) finally got the roof on the chicken coop. Here you can see the edge of it (that's the rest of the roll in the middle)--we used white roll roofing--which is basically shingle-type-material, but in a roll. It took three stripes of it to cover the entire roof. Just in time, too, with all the rain we've been having the seam between pieces of plywood was beginning to leach water onto one of the rafters inside (caulked that, too).


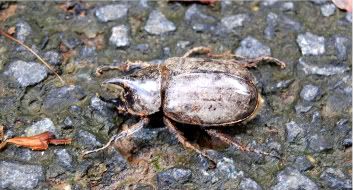
And, lastly, one of the ducks found a crazy looking bug. Any thoughts? I haven't looked it up yet, but I'm thinking maybe some weird type of dung beetle? I dunno. It was almost two inches long, so pretty big.

Duck House


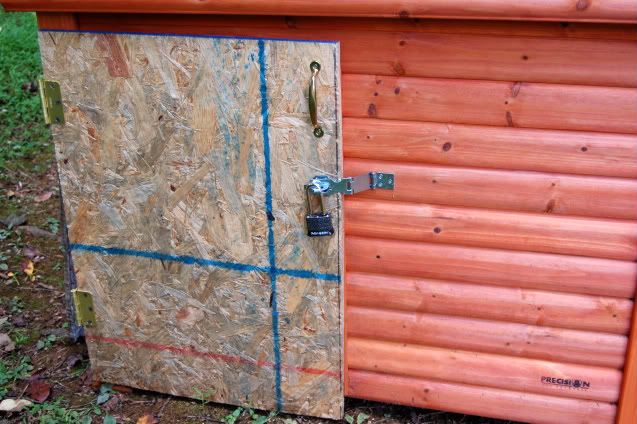
So here's the story (other then the awesome and obvious fact that we've got one coat of paint on the chicken coop...) when Ruby duck disappeared (and both Dorian and Napoleon began exhibiting curled tails) we thought we definitely had an issue. You see, after looking into it, we learned that optimal female to male ratio for ducks is 3 to one (or so the experts say) otherwise they could be more likely to fight. Since we thought we had2 males and onefemale...this was an issue. (Of course, since then, it looks like Dorian's curled tail may have just been a new feather coming in weird...it's um...kind of...gone. Napoleon there's no question about, however.) Beyond that, we'd like our garage back :-) and we're pretty worn out from building things so we thought we'd cheat....that little orange (for now....) building is a purchased dog house.

It needs modification, but that shouldn't be too hard. We need to put a locking door on it (note the plywood blocking the doorway right now...there was a chicken that apparently wandered in and spent the night in solitary confinement the day we got it...so the blockade is necessary) and a few vents. Also, I'm thinking a window for a vent like the chickens have---it might get too warm in there for them otherwise. It looks like it could hold maybe up to 6 ducks. (Popular knowledge recommends 3 square feet per duck...but since they range all day long and apparently all ducks ignore that measurement rule...this is probably ok... we just need to make sure they don't get too warm in the summer.)

Wineberry Jam

First an update: the window is in on the chicken coop, and the ramp for the chickens is complete. It's all ship-shape and the only things left to do are roofing material and painting the outside. After that----the duck house! Although we were thinking of just using a large dogloo for them, it's looking like we will build a lean-to-like structure onto the side of the chicken coop for them. A "duck wing", if you will.

My parents came up for the 4th of July, and they were kind enough to lend their berry-picking expertise. We got, I would guess about 3 cups (or more) on Saturday with them. Then, today, S. and I went back out and picked some more. Now we had 3 large tupperware containers full of Wineberries (and one black raspberry). What to do what to do....well, we were originally going to make a pie or a tart but now we had way too many berries for that...so we settled on jam. (turns out we only used about half of the berries up for that too...since we could only find one box of pectin..)

berries
Wineberries from our yard.

We used the recipe in the package of pectin (as good as any) for "Blackberry, Boysenberry, Dewberry, Loganberry, Raspberry or Youngberry" jam, but there are copious notes and additional steps and edits, added in by yours truly. So really you can consider these steps based on the original recipe, but expanded upon considerably:

Approx. Yield: 8, 8-ounce jars--and we actually did get exactly 8 jelly jars full...but consider yourself warned that regardless of recipe specifications we always make sure there are plenty of extra clean jars on hand, just in case....

Ingredients:
8 cups crushed berries (2 quarts)
7 cups sugar
1 box pectin

1. Prepare boiling water canner, jars and lids

(We usually run our jars through the dishwasher ahead of time and have them at the ready. Most people recommend sterilizing your jars, bands, and lids ahead of time. Inspect your jar bands for rust and dents, and only use non-flawed and never-before-used dome lids. Caution: Always follow all instructions for safety that came with your jars, your lids, and your canner. You should only use a USDA recommended canning recipe. Use any canning recipe at your own risk, and if unsure, caqll an experienced canner or your cooperative extension for help. We usually begin our water bath canner boiling at this time now too, since it takes so long to get a rolling boil.)

mashedberries
Crushed wineberries.

2. Place prepared (crushed berries) in a 6 or 8 quart stockpot (Consider yourself warned that we almost ALWAYS have our jam boil over or splash and it's hard to get the sticky stuff off the stove after it's cool) Do not complete the next step unless your canner is near to boiling. At this stage things can go very quickly and it's better to not have full jars waiting to be canned while you wait for it to reach a boil....this is speaking from experience.

afterpectin
Wineberries and pectin in pot on stove (not sure why the foam here is orange....).

3. Gradually stir in pectin and bring mixture to a full boil over light heat, stirring constantly (be careful of splashes and bubbles---it gets really hot!)

4. Add sugar, stirring to dissolve. Return mixture to full rolling boil. Boil hard for 1 minute (it WILL foam....don't get burned--be careful), stirring constantly. Remove from heat, skim off foam if there's a ton of it, otherwise let it be.

emptyjars
Here are the jars, before we filled them

5. Ladle into jars, one at a time. Leave 1/4 inch headspace. Be sure to run a hot, damp paper towel around the rim after filling the jars. That will get the excess jam off and make sure that the lids seal properly. Then place the dome lids on top and screw on the bands to finger tight. Thump the bottoms of the jars lightly on the counter to get out extra bubbles.

jarsintocanner
Putting the jars in the canner.

6. Place jars carefully into canning rack (in canner) using jar tongs. Lower rack into canner and put lid on canner. Return canner to rolling boil. Once boiling again, leave the jars in for 10 minutes (you might need to adjust the time if you're at a different altitude).

pulling_rack
Raising the canner rack.

7. Carefully (we use orkas, those silicone mitts after learning the hard way that hot wet cloth oven mitts really really suck...) raise the canning rack. Remove the jars one by one using those jar tongs, and place them on the counter on top of a dish cloth (careful...they're hot so don't damage your counter). Leave some space between them for air flow. They'll need to be able to cool gradually.

cooling_jars
Here are our finished jars, cooling.

After some time (anywhere from a few minutes to over night) you'll hear them "ping", which means they are sealed properly. Just like a canned good you buy in the store, the lids will be concave when they are properly canned. The cooling forms a vaccum and 'sucks' the lids down, sealing them properly. You can check them all after a few hours to see if they are sealed--usually we tap the jar lid with the handle of a knife...they make a different noise from those that are unsealed...it's hard to explain (this is where canning with someone experienced if you've never canned before is a good thing)...but if you're ever not sure, stick that jar in the fridge and eat it over the next few days....just to be safe.

After the jars have cooled, label them with date and contents. Store your jam in a cool, dark place (dark basements work well for this) unitl ready to consume. The USDA and the National Center for Home Food Preservation has great guidelines on how long your canned goods can be kept safely, too.
Today we got enough done on the coop that tonight the chickens are in it for the very first time. They looked startled and confused when we put them in, and didn't move around much.

Not sure if we should leave 'em in there for a few days to get used to the place or not...but I'm not super comfortable with that idea since the window isn't in yet. (Some people say to leave the chickens closed in a new coop for a few days so that they will learn to recognize it as home, and naturally go in at night to roost.) Without the window in yet it's dark, and ventilation may not be super good (although we did cut a few ventilation holes)...so we'll probably let them out tomorrow for the day.

chicken_door
This is the chicken door (I think it's called a 'pop' door). We had to get a different latch for it since we couldn't get the first one to work.

roost
These are the roosts.

According to my research, you need approx. 10 inches of roost per chicken for standard sized chickens. Since our coop is technically for 8-12, we put in enough roost for 12 (120 inches). That way if we find that there aren't enough chickens to warm the slightly-too-large coop warm this winter, next year we'll have room to add 6 more without needing modification.

Also, according to my research (where I found multiple suggestions--always---I took the one that worked for our "guinea pig" chicken--yes we tried out perch sizes using a real chicken---or I took the average measurements) we put 12" in between perches (vertically) and placed them no less than 12 inches from the wall. We have three levels-one at 12", one at 24" and one at 36". That way they can choose their roost according to preference and pecking order. (Also it's important to have roosts higher than the nest box perch so they won't roost there--the nestbox roost is at about 23".

feederincoop
This is after we put the feeder in (we suspended the feeder and waterer from the roof rafters with swingset chain).

We'll need to buy a different waterer--the one we got doesn't hang well, it has a flat handle. So for now we're using the 1 gallon waterer that we were using before. That's a 30 gallon metal feeder in the picture.
Here are the additional photos, as promised:

wholewdoor
Chicken coop, door attached

opendoor
Inside of the door

nestboxcovered
Nest box cover is on

paintedinside
The inside is painted now, too, and we have hardware cloth over the eves.

Weekend Update

First:
7wksducks
Clockwise left to right: Ruby, Napoleon, Neptune, Dorian [Grey] (he's complicated...)

11wkschickens
Left to right: chicken 1, chicken 2, chicken 3, chicken 4, chicken 5, ((chicken 6 not pictured)

Second: we got all of the walls on and began painting the inside of the chicken coop (for ease of cleaning).

walledcoop

We stopped painting because we'll need a roller for the insides of the walls and the floor. All that's left to do after that is the door, the chicken door, the roosts, and to put the nest box cover on. Oh, and we're going to try roll roofing...so there's that too. And, of course, painting the outside.
roof2walls
Chicken coop--note roof and walls

So yesterday we put 2 walls on the chicken coop. The chickens and ducks came out for a bit (it rained Saturday morning, but they came out Saturday afternoon---the ducks had several dips in their pool--they're getting big!) Turns out, after reading the bag of feed, we were a bit early switching the chickens over--umm...oops. You know, they spell it out for you on the bag, you wouldn't think it would be that complicated.....oh, well. Hopefully we haven't stunted anyone's growth.

lettucegarden
Here's an updated pic of part of the garden--(Note Lettuce starting to bolt)

peas
Peas from the garden--mostly 'Wando'

We harvested some lettuce, some kale, and lots of peas (our mesclun and mixed salad green seeds never did germinate. Not sure why---heck, maybe they washed away there's been so much darned rain this spring). Maybe soon we'll even have some beans ready to come in soon--there are some starting to set. Mental note: definitely plant the 'Wando" peas again--they are very large peas and prolific!

butterfly_bush
Butterfly bush

Our butterfly bushes are starting to bloom (they smell so good! I think at least one of the two is a Black Knight) and the daylilies behind the house are starting to bloom too. Last weekend we got some sedum (Autumn Joy), three celosia, and some ageratum to put in the front bed 'cause I just couldn't stand that it was June and there was nothing blooming in our front flower bed. I mean, what kind of poor planning was that? Oh, and a hanging basket with orange gerbers (we've had those perrenialize before--hopefully they will here and we can plant it in the flower bed later in the season).
Today we planted most of our garden. Ten tomatoes (one Patio, two Early Girl, one Cherokee Purple, one Mortgage Lifter, two Viva Italia, one Park's Whopper and one Sungold). Phew. Also planted: 3 bell peppers, 6 eggplants, 4 hills scalloped summer squash, 4 hills zucchini, 2 hills acorn squash, one row National Pickling cucumber, one row General Lee cucumber (a slicing type), and 2 rows of Clemson Spineless Okra. Did I already say "phew"?

coop_fail

We also did some work on the chicken coop. (Did I mention that we're building a chicken coop? Well, we're building a chicken coop!) We had already finished the floor, and were working on the joists and studs--we ended up taking those down and redoing it (Note above picture...before redoing....Very structurally sound....not.)--turns out you're actually supposed to frame them before you put them up. Sure enough, they are much sturdier walls now. (Thanks free online plans which shall remain unnamed....hmph) Two of the sides are now done. **update: May 30---Finished framing last two walls of chicken coop and purchased wood for nest box.

The chickens are getting bigger......

teenage_chicks


Oh and does anyone hate Carpenter Bees as much as I do? They are everywhere! Our deck, our picnic table....everywhere!
Related Posts with Thumbnails