Showing posts with label preserving. Show all posts

Grapefruit (marmalade)

So while I was meeting some new friends, I also met my first citrus tree. It was a grapefruit tree.


So...naturally we picked some grapefruit ('tis the season for grapefruit, apparently).
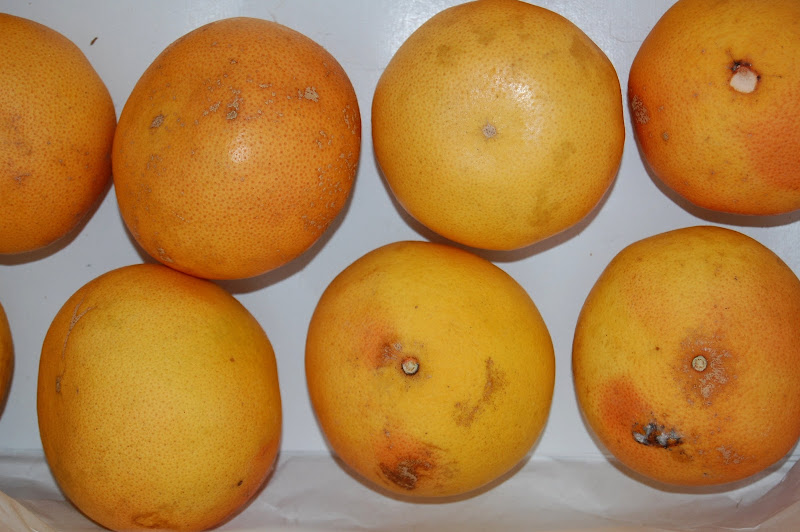

Now this all happened the week of Christmas...quite some time ago...what to do with with all of this rapidly-becoming-overripe grapefruit? Can it, of course...

We made grapefruit marmalade (I haven't opened it yet, but I tasted it before canning and it was quite tart...something that I would like on an english muffin, but not to everyone's taste.)

So, without further ado...here's what we did (amounts from the recipe are approx, as we doubled-ish):

Grapefruit Marmalade (adapted from the Ball recipe)
Yield: about 3 half-pints (We canned 8 jelly jars after doubling the recipe)

- 2/3 cup thinly sliced grapefruit peel
(the recipe claims that this is about one medium grapefruit..we didn't find any of the equivalencies to hold true for our grapefruit..it was more like 2 of ours)
- 1 and 1/3 cups chopped grapefruit pulp
(I poured the majority of the juice out and put it in the fridge)
- 1 quart water
- sugar


Here's our peel...ready to go


...and this is our pulp.
I tried to actually remove the membranes as well as I could...messy, juicy work!


Cover grapefruit peel with water; boil 10 minutes; drain. Add chopped (ha! chopped? Have you ever tried to chop the inside of a grapefruit?!) pulp and 1 quart water to drained peel; boil 10 minutes. Cover and let stand for 12 - 18 hours in a cool place. (Ours actually ended up 'sitting' for more like 20-24 hours....) Then cook rapidly until peel is tender (only took us another 5-10 min).

Here's the mixture...tenderizing the peel

Measure fruit and liquid -- add 1 cup sugar for each cup fruit mixture (we doubled the recipe, and I recall had about 6 and a half cups of mixture), stirring until sugar dissolves. Bring to a boil over high heat, stirring constantly to prevent sticking (ours really didn't have a sticking problem--unlike most canned jams/jellies/butters we've made). Cook rapidly until almost to gelling point (I believe gelling point is 120 Fahrenheit--use a candy thermometer)


Skim foam if necessary (it wasn't...). Ladle hot marmalade into hot, sanitized, jars, leaving 1/4 inch headspace. Adjust two-piece caps and process for 10 minutes in a boiling water bath canner.


**I included more information in an earlier canning post about the process. These are by no means exhaustive or even all-inclusive instructions. If you're not familiar with canning, consult an expert or your local cooperative extension office for safety information.

If you're not comfortable with canning, you can always make a small batch and keep it in the fridge for a week or less (if it even lasts that long--yum).

Apple Butter

A few weeks ago we finally got around to making this year's batch of apple butter. Now I'm sworn to secrecy to the actual recipe that we used (heirloom and all) ;-) But I'm more'n happy to share a recipe that we've used in the past (just a note that we actually canned 25 lbs of apples at once this time. Never ever do that. Seriously. Boiling apple sauce shoots like lava out of a volcano...no joke. Just consider yourself warned and repeat after me...small batches...small batches...) We usually try to use either Stayman or Winesap apples, but any cooking apple will work. So first some photos, and then a recipe at the end for you......


Here's our 25 pounds of apples


Peeled (We chopped them into approx. 1-2 inch chunks.
The smaller the chunks, the faster the cooking down goes.)


Here they are, starting to cook down...


Spices and sugar, ready to be added (the exact spices and ratios are the top secret bit here....)


All together in the pot (it's really starting to smell good by now)


Of course, once that's done you'll need to have your water bath canner
already all heated up and ready to go.


All done. Be sure to let the jars sit a few weeks before tasting it...
they'll mellow a bit and taste even better!


Apple Butter
Adapted from the Ball Blue Book
Yield: About 3 pints

Remember to refer back to this post, which details the boiling water canning method a bit more, if you're unfamiliar with the process.

Ingredients:
4 pounds apples (about 16 medium apples)
4 cups sugar (we usually do at least half of this as brown sugar)
2 teaspoons cinnamon
1/4 teaspoon cloves
(any other seasonings that take your fancy...like I said, 0urs are top secret... but any of those common-to-pumpkin-pie spices would probably work well. Just remember to go easy. As the butter sits in the jars, aging, the spices will strengthen.)

Wash apples--peel and slice into 1-inch pieces (remove the cores, too). Combine apples and 2 cups water in saucepan (we usually just dump the apples in, no water. It gives the butter a slightly more concentrated taste without having to cook for quite as long). Simmer until apples are soft. Puree, if desired (we use a potato masher, as necessary. Just to get the big lumps out. If you cook them long enough, they'll be soft enough to do this--but feel free to use a food mill if you like.) Add sugar and spices to cooked apples, stirring in. Cook slowly until thick enough to round up on a spoon--stir frequently to prevent sticking (and burning). Ladle hotmixture into pint jars (leave 1/4 inch head space). Clean jar rims, and afix lids and rings. Process 10 minutes in a boiling water canner.

Dilly Beans


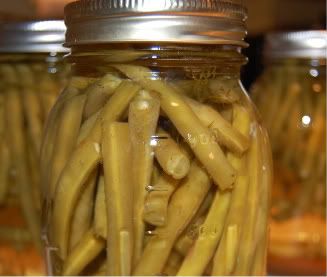
Friday we finally got around to making Dilly Beans. Here's the recipe, ala Ball Blue Book, as translated by moi.

Dilly Beans
(as stated in the recipe)
Yield: about 4 pints or 2 quarts

2 pounds green beans
1/4 cup canning salt
2 1/2 cups vinegar
2 1/2 cups water
1 tsp cayenne pepper, divided
4 cloves garlic
4 heads dill

We sextupled the recipe, so we used:
12 pounds green beans
1 1/2 cups salt
15 cups vinegar (we used white vinegar so that the vinegar wouldn't color the beans)
15 cups water
6 teaspoons cayenne pepper, divided
30 cloves garlic (2 per quart)
1/4 and 1/8 tsp dried dill per jar (We also divided a package of fresh dill--can never get that stuff to grow!-- amongst the 15 quart jars)

The recipe is as follows:
Trim ends off green beans. Combine salt, vinegar, and water in large pot. Bring to a boil. Pack beans lengthwise into [hot] jars, leaving 1/4 inch headspace. Add 1/4 tsp cayenne pepper, 1 clove garlic and 1 head dill to each pint jar. Add 1/2 tsp cayenne (we used a scant 1/4tsp per quart since I'm not a big spicy food person), 2 cloves garlic, and 2 heads dill per quart jar. Ladle hot liquid over beans, leaving 1/4 inch head space. Process in hot water bath for 10 minutes for both pints and quarts.

Here are the jars, packed with dry ingredients.

Our batch was about 12 pounds of green beans. The recipe of sextupled vinegar mix filled enough for 12 cans (unfortunately our batch of beans filled 15 jars...so we had to remake the vinegar mix in order to fill our jars)

The sealed jars (except for one, which remained unsealed, even after reprocessing...)

All of the jars 'popped' but one--so we stuck that one in the fridge. I'm not sure how long it'll keep for. Pickles don't really taste right until they've had a week or two to sit, though...so I'm hoping they'll be ok for that long!

We flipped the jars over to make sure the vinegar got to the tops of the beans.

The next day, we inverted the jars to make sure that even the beans poking out the top of the vinegar solution would get well-covered and pickled. Later that day I flipped them back over to upright.

I can't wait to taste the jar in the fridge--they look pretty good...

Freezing Wineberries

A comment on my wineberry jam post recently brought wineberries back to the forefront of my mind. I realized that I never followed up on what we did with the rest of them. We actually didn't use all of the wineberries in the jam, and picked even more the following weekend. Thinking that they would be nice for a holiday or winter-time dessert, I froze them.

It's really easy to freeze berries. You just spread them out flat on a tray and stick them in the freezer overnight ( our were in there for a day or two).

Here they are after I pulled them out of the freezer.

Then you just put them all into a freezer bag.

Taking the frozen berries off the tray

The above picture is the batch we picked the next weekend. They were a bit riper and juicier so stuck to the tray more. I found that a spatula worked really well to scrape this batch off the tray without damaging them to much. The first batch was pretty easy to just loosen with your fingers.

The bag of frozen berries.

Remember to label the bag before it's cold. That's what happened here--I froze them in two batches so when I pulled the bag out to add the second batch a bit of condestaion started to develop---making it a little tricky for the marker. Ooops. :-)
When we had my parents over for the 4th of July, we had shrimp, clams, portabella mushrooms, potato salad, bean salad (that they brought) and grilled corn. By the time we got to eating the corn, everyone was stuffed (and forget the pound cake that we had for dessert...that just wasn't happening.) Luckily we had only grilled a few ears--6 or so and it wasn't a huge deal.

The huge deal was the remaining 31 ears in a crate in our mudroom....Yes, folks, we got a great deal at the grocery store on friday....one that we just couldn't pass up...$12 for 48 ears of corn, that is...and THAT is why we need a freezer. We usually cook with frozen corn in the winter, so why not, faced with a deal such as this.....freeze our own? Our trusty copy of "How to Store your Garden Produce" by Piers Warren in hand, we looked it up. Blanching. Aha. Ok then. Here we go:

shucking
First we shucked all of the corn. (Here's S.)

corn
Here it all is, fully shucked.

The corn that we use over the winter is dekerneled (is that even a word?)...so we decided it would be more useful to preserve them that way. That was the next step, taking the kernels off of 31 ears of corn (yes, I counted.) S. got really close to the cob when he did this so we got tons of corn off of the ears.

dekernling
S. removed the kernels

The next step was to blanch the corn. This is done to preserve the sweetness and texture of the corn through the freezing process (someday maybe I'll experiment with the same batch of corn..some blanched, some not, to see if it really makes a difference.) Dekerneled corn only needs to be blanched for 1 minute--we did it in batches since we had so much corn.

boilingcorn
Corn kernels blanching


After boiling them for 1 minute they got an ice water treatment to stop the cooking process.

icewatercorn
The corn in ice.

Then we put them into freezer bags. 4 and a half gallon-sized bags later, we were done. Doesn't it look yummy to be frugal? This is much more corn for much less money than if we had just bought it frozen.

freezer_corn
The corn in the freezer.

We've been talking about getting a chest freezer for a while now...at this rate we may want to consider it sooner rather than later.....

Wineberry Jam

First an update: the window is in on the chicken coop, and the ramp for the chickens is complete. It's all ship-shape and the only things left to do are roofing material and painting the outside. After that----the duck house! Although we were thinking of just using a large dogloo for them, it's looking like we will build a lean-to-like structure onto the side of the chicken coop for them. A "duck wing", if you will.

My parents came up for the 4th of July, and they were kind enough to lend their berry-picking expertise. We got, I would guess about 3 cups (or more) on Saturday with them. Then, today, S. and I went back out and picked some more. Now we had 3 large tupperware containers full of Wineberries (and one black raspberry). What to do what to do....well, we were originally going to make a pie or a tart but now we had way too many berries for that...so we settled on jam. (turns out we only used about half of the berries up for that too...since we could only find one box of pectin..)

berries
Wineberries from our yard.

We used the recipe in the package of pectin (as good as any) for "Blackberry, Boysenberry, Dewberry, Loganberry, Raspberry or Youngberry" jam, but there are copious notes and additional steps and edits, added in by yours truly. So really you can consider these steps based on the original recipe, but expanded upon considerably:

Approx. Yield: 8, 8-ounce jars--and we actually did get exactly 8 jelly jars full...but consider yourself warned that regardless of recipe specifications we always make sure there are plenty of extra clean jars on hand, just in case....

Ingredients:
8 cups crushed berries (2 quarts)
7 cups sugar
1 box pectin

1. Prepare boiling water canner, jars and lids

(We usually run our jars through the dishwasher ahead of time and have them at the ready. Most people recommend sterilizing your jars, bands, and lids ahead of time. Inspect your jar bands for rust and dents, and only use non-flawed and never-before-used dome lids. Caution: Always follow all instructions for safety that came with your jars, your lids, and your canner. You should only use a USDA recommended canning recipe. Use any canning recipe at your own risk, and if unsure, caqll an experienced canner or your cooperative extension for help. We usually begin our water bath canner boiling at this time now too, since it takes so long to get a rolling boil.)

mashedberries
Crushed wineberries.

2. Place prepared (crushed berries) in a 6 or 8 quart stockpot (Consider yourself warned that we almost ALWAYS have our jam boil over or splash and it's hard to get the sticky stuff off the stove after it's cool) Do not complete the next step unless your canner is near to boiling. At this stage things can go very quickly and it's better to not have full jars waiting to be canned while you wait for it to reach a boil....this is speaking from experience.

afterpectin
Wineberries and pectin in pot on stove (not sure why the foam here is orange....).

3. Gradually stir in pectin and bring mixture to a full boil over light heat, stirring constantly (be careful of splashes and bubbles---it gets really hot!)

4. Add sugar, stirring to dissolve. Return mixture to full rolling boil. Boil hard for 1 minute (it WILL foam....don't get burned--be careful), stirring constantly. Remove from heat, skim off foam if there's a ton of it, otherwise let it be.

emptyjars
Here are the jars, before we filled them

5. Ladle into jars, one at a time. Leave 1/4 inch headspace. Be sure to run a hot, damp paper towel around the rim after filling the jars. That will get the excess jam off and make sure that the lids seal properly. Then place the dome lids on top and screw on the bands to finger tight. Thump the bottoms of the jars lightly on the counter to get out extra bubbles.

jarsintocanner
Putting the jars in the canner.

6. Place jars carefully into canning rack (in canner) using jar tongs. Lower rack into canner and put lid on canner. Return canner to rolling boil. Once boiling again, leave the jars in for 10 minutes (you might need to adjust the time if you're at a different altitude).

pulling_rack
Raising the canner rack.

7. Carefully (we use orkas, those silicone mitts after learning the hard way that hot wet cloth oven mitts really really suck...) raise the canning rack. Remove the jars one by one using those jar tongs, and place them on the counter on top of a dish cloth (careful...they're hot so don't damage your counter). Leave some space between them for air flow. They'll need to be able to cool gradually.

cooling_jars
Here are our finished jars, cooling.

After some time (anywhere from a few minutes to over night) you'll hear them "ping", which means they are sealed properly. Just like a canned good you buy in the store, the lids will be concave when they are properly canned. The cooling forms a vaccum and 'sucks' the lids down, sealing them properly. You can check them all after a few hours to see if they are sealed--usually we tap the jar lid with the handle of a knife...they make a different noise from those that are unsealed...it's hard to explain (this is where canning with someone experienced if you've never canned before is a good thing)...but if you're ever not sure, stick that jar in the fridge and eat it over the next few days....just to be safe.

After the jars have cooled, label them with date and contents. Store your jam in a cool, dark place (dark basements work well for this) unitl ready to consume. The USDA and the National Center for Home Food Preservation has great guidelines on how long your canned goods can be kept safely, too.
Related Posts with Thumbnails