Eggs for breakfast

On Friday we got our seventh egg from the chickens (then, this afternoon we got an eighth).

Here are the first 7 eggs. (That's still that same store-bought egg in the lower left)

So we decided to have fried eggs for breakfast...
(and yes, that very first egg was a double-yolk)

This is the first egg we found...a double-yolk

They're still on the small side since the hens just started laying, and we noticed a few things right away. The yolks are dark orange, nothing like the eggs from the grocery store. The yolks were on the small side, too, but very round and they seemed to sit up higher in the whites. The shells were all thicker than the standard grocery store fare, too.

Here they are in the pan. These are our first 3 eggs (4 yolks due to the double)
--there's some butter in that pan, too.


And here's breakfast...

They were absolutely delicious...I've never tasted an egg so good before (not that I'm biased or anything) :-) They were really rich and almost yolky....hard to describe, but I thought they tasted healthier. And they should, since our chickens have free range of the yard (and munch on greens all day) and get scratch grains (mostly corn and oats) every morning.

Pizza Friday


Just look at those homegrown tomatoes....

Yesterday, when we came home, Ruby duck was missing. Coyote? Fox? Bobcat? Wanderlust or a walkabout? We're not sure. We looked all over, and couldn't find any signs of a struggle--no feathers or anything. The other ducks didn't seem worried or alarmed (which is saying something since they all follow each other around in a pack...)

They've all been flying (about 2 feet off the ground) after me to get to the chicken coop in the morning, and they are mallard mixes....so it's entirely possible that she just flew off. Especially, I think, in light of the other ducks not acting scared or worried. Then again, if they never saw the beasty that got her...they wouldn't necessarily be acting strangely.

In other news, two of the remaining ducks seem to have tail curls now: it looks like Napoleon and Dorian were both aptly named. Of course that means we now have what looks like 2 males and 1 female and that's not good. I think we're going to have to look into getting a few more female ducks in order to keep the peace around here, 'specially with Ruby gone.

6 Eggs

On Monday we found another egg in the nestboxes. It's from one of the Red Stars. That's a half dozen so far, and much earlier than I thought we would get that many....but I do wish the White Rocks would keep up! :-)

Our 6 eggs -- the other row has a store-bought egg for size comparison.

Oh--and a gratuitous duck picture...aren't they getting big? Napoleon is getting a little curled feather on his tail...so he might be a male. No other tail curls so far...

Left to right, it's Dorian (wandering out of the picture), Napoleon, Ruby, and Neptune.

Tomatoes in Muffins


I love making muffins. They're so forgiving. You start with a sweet base or a savory base and just add what you like---the only thing you need to remember is to keep the correct wet/dry balance...then you just lump them in the muffin tins and cook them for 20 or so minutes and there you have it. Pretty hard to miss your mark with simplicity like that.

The recipe that I usually use came originally from Joy of Cooking, but I've modified it slightly to suit my purposes. I made some delicious muffins this past weekend using some of our garden-grown tomatoes as add-ins (this of course adjusted my liquid amount a little bit, as they were rather juicy). The original recipe is great with any sort of savory seasonings. A regular of mine is cheddar cheese and chives, I've also made sun-dried tomato muffins a few times...whatever suits your fancy. (I'll include the changes to my usual recipe in blue--since I had to change the liquid amount a little bit for this particular variation.)


Tomato Muffins
I have super-large muffin tins that are about twice as big as regular ones--this recipe made two big tins and one regular...so my guess is that it would make about 30 regular-sized muffins.

Ingredients:
7 cups flour
4 tbsp baking powder
4 tbsp sugar
2 tsp salt (I usually use about half to three-quarters of this amount)
4 eggs
4 cups milk (this tomato recipe added liquid from the tomatoes, so I only used 3 and a half cups of milk)
12 tbsp melted butter (that's 1 and a half sticks)
several tbsp mixed italian seasoning (I didn't measure, I just sprinkled it in until I saw lots of green flecks in the flour mix...)
1 tsp oregano
1/3 cup grated romano cheese
(also a healthy dash of grated parmesan)
4 med-small tomatoes, diced -- and their juice (about a half cup of liquid)


Preheat oven to 400 degrees Fahrenheit. Mix dry ingredients together (I rarely sift, but feel free if you prefer)--that's the flour, sugar, salt, baking powder, and any dry herbs/seasonings or cheese (in this case, add the orgeano, italian seasoning, and two types of cheese here).

Dry ingredients

Melt the butter over low heat, being careful not to cook it too l0ng or solids will develop. Break eggs into separate bowl (break the yolks) and combine them with the other wet ingredients---that's the butter, milk, and any wet flavorings (this is where I added the tomatoes).

Wet ingredients

Then, combine wet and dry ingredients (stir as little as possible as more stirring causes the muffins to be too glutinous..) It's supposed to be lumpy---just make sure you get any pockets of the dry ingredients or flour lumps out.

Combined wet and dry ingredients--note the jagged lumps.
(This dough is a little overly moist, but it came out great.
)

Fill well-greased muffin tins 3/4 full with batter (I don't use liners since I find that the muffins really rarely stick when you grease the tins well enough), and place in oven.

Muffins in the oven

Bake 20-30 minutes (at 20 minutes take them out and use a clean knife or toothpick to check for doneness...) They should only get very slightly brown on top---not very much at all. If they are starting to brown a lot they're probably done! (For these muffins, the recipe made two large tins and one regular. The regular-sized muffins --conincidentally on the baking stone that we left in the oven...oops... and one tin of large ones that were on the bottom rack, were done in 20 minutes. The other large tin on the bottom rack needed another 7 minutes.)

Here are the two sizes of muffin tin--on top is regular-sized, on the bottom are the huge ones. I love the huge muffin tins...how can you not like something that gives you more home-baked muffin goodness?

Ice Cream


Yesterday we made ice cream. Why? Well, why not? You see, we have this water filter owing to our well water. Part of it is a water softener and uses salt pellets (they're big when you put them in, the size of 2 peanuts next to each other). When the salt gets used up, and it's time to add more, it looks like rock salt.

Used up salt from water filter

Doesn't that just beg for an ice cream maker? What could be more perfect than a supply of rock salt in your basement?

We didn't want to go get cream or half and half or any of that, so we used a simple milk-sugar-vanilla recipe. That means it isn't as creamy as some recipes, or as the custard-based ones (although the third Red Star laid its first egg, so now we have 4 of our own eggs that we could have used for that...hmmm...)

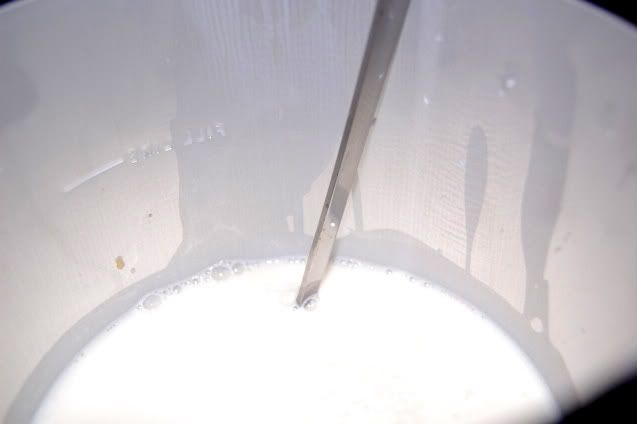
First you mix your ingredients together in the canister of your ice cream maker.

Ingredients, mixed in canister.

The recipe claims to make 1 gallon, which is just how much our ice cream maker says it can hold. Then you just put your ice cream maker together, add salt and ice, and let 'er rip. (This is when we moved it outside, just in case it got messy...)

Ice cream maker, assembled and loaded up with ice and rock salt

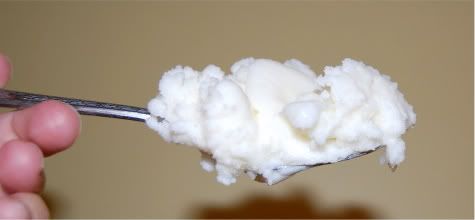
Done churning, about the consistency of light whipped potatoes--and fluffy. Feel free to taste :-)

Once it's done churning, it'll need to harden up in the freezer for another hour or so, then--voila.

Easy 4-ingredient Vanilla Ice Cream

8 cups milk (we used whole milk)
2 cups white sugar
1 tbsp vanilla extract

Combine ingredients in the canister of your ice cream maker and stir. Then just follow the directions for your individual ice cream maker to freeze/churn, since they're all different. We assembled the canister into the center of our mixer, and added layers of ice and "rock" salt until it reached the top of the canister. Then we just turned it on to churn for the specified time in the manual (in this case 20-40 minutes). After that, we took the lid off to check on consistency. It had thickened nicely, so we just removed the canister and stuck it in the freezer to harden for another few hours. Yum.

Notes: Next time we'll add double the vanilla flavor--and while delicious, I'm sure it would have been creamier had we used some cream.
Happy Birthday, S!
Related Posts with Thumbnails